Chris Guise, the creator of this landscape, explains step-by-step how he created the Bag End.
Tree before and after carving
Not long after I bought this tree I carved a shari down the trunk, covered the edges with cut paste and left it alone. After two years the edges had callused over nicely. Not long after I did it I decided that I would like to hollow out the trunk further but never got round to it.The carving work was done with a dremel, using various small carving bits.
The carving up to this part-finished stage took approximately 3 hours, I had to be very careful not to spoil the rolled callus that had formed at the edges from the previous shari carving session. Fore more information, read about
Pruning and
Wiring Bonsai.
Window & door
The door construction was quite simple. Miniature planks were made, with the edges beveled and sanded. The planks were laid upside down on the table and more strips were stapled to the back. Then the door was cut to shape and sanded smooth.
For the window I used a disk of black reflective plastic. Being reflective, it looks like glass, and being black it gives the impression of a dark interior. The cross-pieces were cut from the same strips of wood as the fencing, fitted together given a coat of green Cuprinol. The door was also given a coat of cuprinol and the knob was fitted.
Positioning the tree
After fitting the drainage mesh and tie-wires to the slab a mound of akadama was placed on it and the tree gently positioned and secured. I then built a peat/clay 'muck' retaining wall around the outside backfilled it with
bonsai soil. Also, read more on
repotting Bonsai.
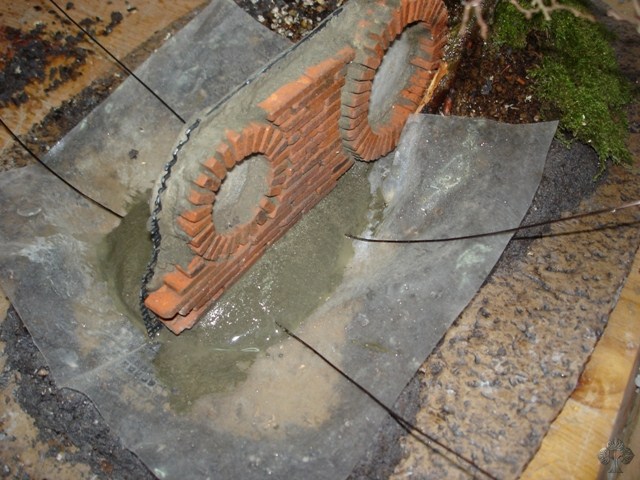
The brickwork front
The frontage was built onto a plastic mesh backing. The mesh binds everything together so that the finished item is able to withstand a lot of handling. The bricks were cut from a roofing tile, tumbled to knock the sharp edges off and cemented around a round plastic former. After the window and door were finished the space in between was bricked up.
Positioning the brickwork
The next step was to position the brick front. To do this I spread a plastic sheet over the slab and mounded up some quick-dry cement mix on it. I pressed some aluminium tie wires into it and then gently eased the brickwork over the top of the wires.
Brickwork foot and making the fence
After carefully settling the brick front into position it was left to dry for a hour or so and then carefully removed. While the cement was still 'green', i.e. firm but not quite dry, I trimmed and tidied up the bottom edges.
For the fence strips of Meranti wood were split with a knife and wound together with anodised aluminium wire. Before assembly the strips were given a coat of diluted dark wood stain to take away the freshly-cut look, and the wire was aged by rubbing it with wire wool.
Building up the hill
After the brick front was secured I started work on the back. I needed to build up a high mound of soil behind the frontage, even higher that the top of the bricks so I decided to try using florist's Oasis as a filler. It is very light, obviously absorbs lots of water and is easy to cut and shape. It was secured to the back of the brickwork with wire and was then covered over with a thin layer of muck and potting soil.
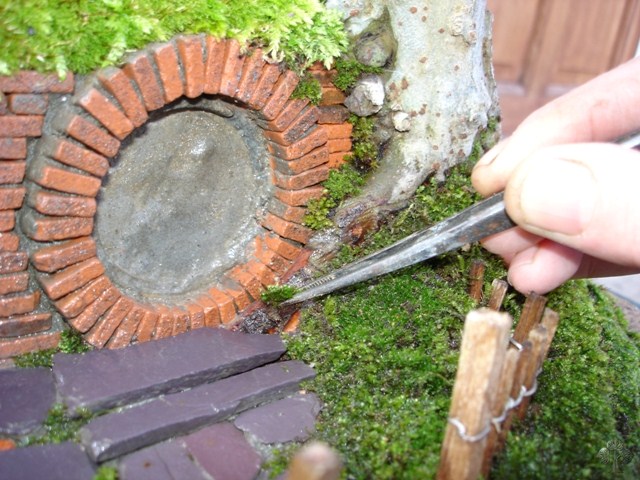
Positioning the fence and more brickwork
The fence was pushed into the muck wall that I had built earlier and firmed into place. The step in the gateway is a small coloured and textured cement slab left over from another project.
After the main components were in place I found I still had a gap between the door frame and the tree. The picture shows the solution, some brickwork and moss in behind the warty lumps on the trunk of the
Bonsai to fill the gap.
Making the doorknob and drilling the door
The brass doorknob was turned on my small metalworking lathe. After rough turning it was finished off with fine emery paper and then wire wool.
A hole was drilled in the door, also on the lathe, so that I could fix the knob in place with a small screw from the back.
Adding moss
I had built a slate path up from the gate to the front door, with a little paved area extending under the window. The cracks and gaps between the slabs were filled in with little tufts of moss (read more about
moss for bonsai purposes)
More moss
I had built a slate path up from the gate to the front door, with a little paved area extending under the window. The cracks and gaps between the slabs were filled in with little tufts of moss. The final touch, a tiny broom bought from a doll's house shop.
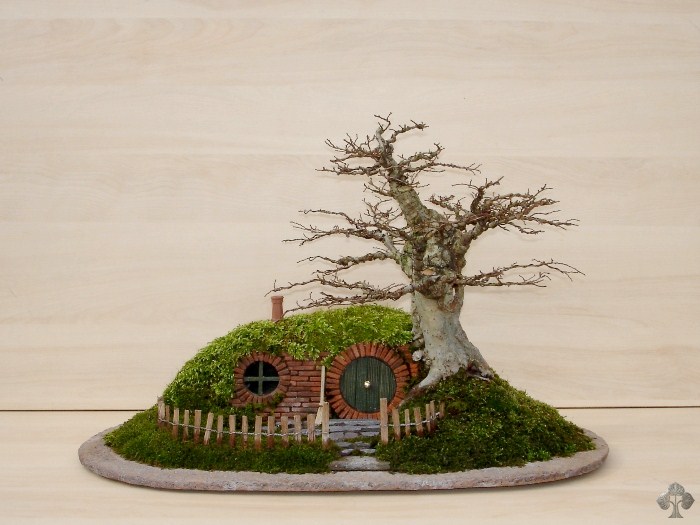
Finished
Finally the trayscape was finished. I would estimate that I spent over 80 hours working on this project. Some of the items were made twice, sometimes because of scaling problems and sometimes because I was not happy with the quality first time round. The most important thing all the way through was to end up with a 'lived-in' look.
The very last thing to be fitted was the chimney stack. To fit it I carved a little wooden stake to fit up inside and pushed the other end through the moss and into the soil beneath.
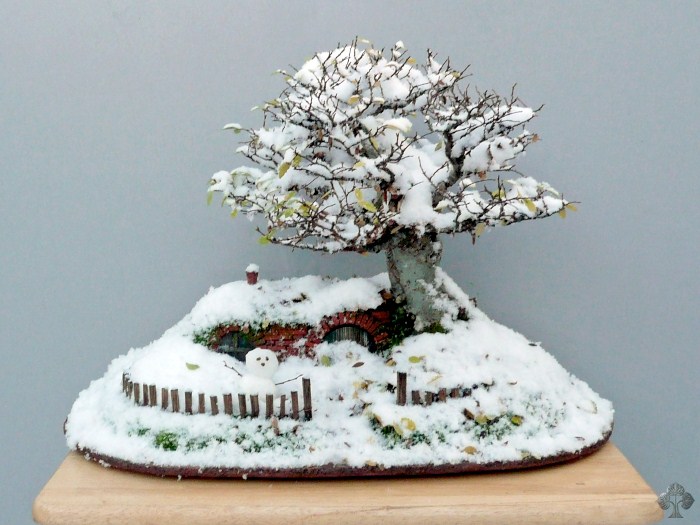
The Bag End Bonsai landscape in winter; notice the little snowman!
A stunning detail shot of the Lord of the Rings Bonsai landscape
 It was based on the Japanese alcove, called Tokonama, which first appeared in the late Muromachi period (14th-16th century).